Easy DIY Crown Moulding To Match Stained Wood Cabinets/Trim/Etc
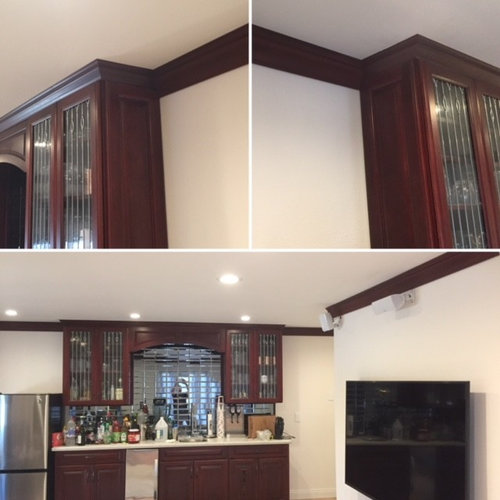
My husband and I are in the process of using this technique a second time so I thought I'd share. Our first project was to add crown moulding to a room we'd recently renovated to be a game room/bar. We had dark reddish stained cherry cabinetry installed and rather than do plain white painted moulding, decided to try and match the cabinetry. Here is our result,
So this is how we achieved the look.
We bought a foam moulding, which is much lighter and easier to install - you just use an adhesive. If you do not have the tools or know how to cut inside and outside corners, companies that sell foam moulding usually also offer precut corners.
The product as manufactured is a light blue color.
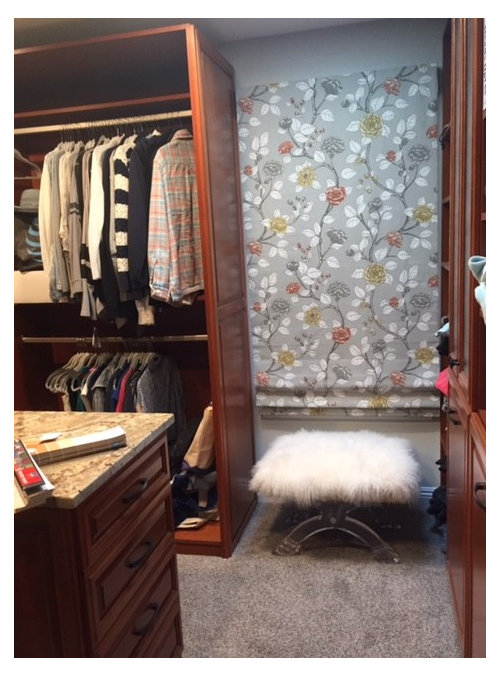
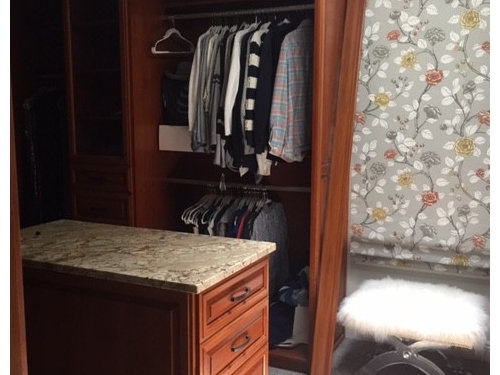
So here is our next project - moulding in the master closet. This is cherry wood with a rusty/brown tone.
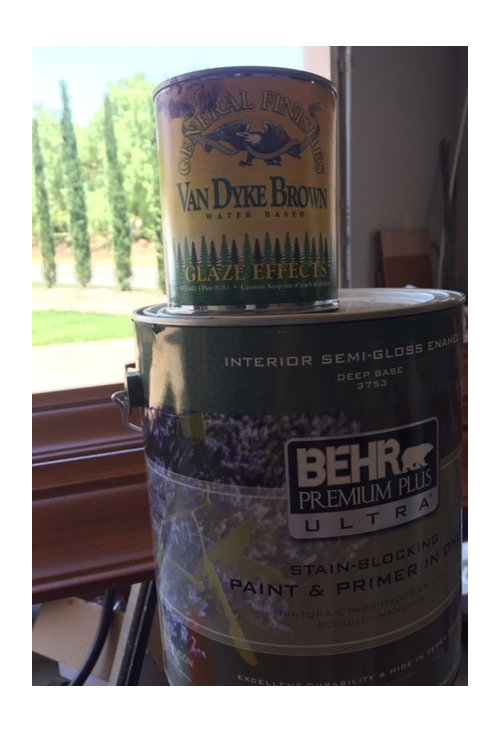
The first step is to choose a paint color that best matches the undertone color of the stained wood. Nothing will be exact, but you want to get pretty close, and stay a shade lighter. Here is the sample I picked for base coat of the master closet.

Next, paint the foam moulding with two coats of your selected base color. I like to use an enamel semi gloss. When the paint is completely dry, you will add a glaze effect. Examine the wood you are trying to match for the color that highlights the wood grain. In the case of our game room/bar, it was black. But with the master closet, it is dark brown. So, here is my paint can with my base color and my little can of glaze in a dark brown color.
This picture shows the back side of the moulding along with a completed piece, so you can see how two coats of base plus the glaze gives you the right amount of coverage. You would never know it started out as all blue foam.

Applying the glaze to get a real wood look effect may take a bit of practice on a sample piece, but it is really easy (once you get the hang of it) and requires no special tools. I had purchased a set of wood graining tools to use the first time, but quickly abandoned them. There was too much curvature and detail in the moulding. I found that what worked best for me was pouring a small amount of glaze in a container and diluting it with a bit of water. For the master closet, I actually did significant dilution so the solution applied was quite watery. This isn't an exact science and something you will want to experiment with, but the glaze out of the can is too heavy and thick to use to achieve a wood grain look without some dilution.
I applied the watered down glaze with a cheap foam applicator brush. Make sure to paint and glaze all visible edges of the moulding. The technique that worked best for me was to soak the foam and apply the diluted glaze across the entire piece of moulding and then continue to use long brush strokes down the moulding with my by now drier applicator to soak up drops that gather and to begin to see lines that give a wood grain look. You can use an artist's brush to do swirls to look like knots, and sometimes you may want to wipe off excess glaze solution with a damp rag. Again, it isn't an exact science and requires some patience and practice, but no special art skills or tools.
Below is a picture of my completed moulding pieces.

So, how does this compare to the wood in the closet? Take a look:

I'd say it is pretty good match! Now, we just have to cut and install it! This is an easy and fun way to spruce up a room. We've done crown moulding but this technique should also work for ceiling medallions and other accent pieces you want to match up to wood tones in a room.
(10) kommentarer

April Sakane
Forfatter5 år sidenSidst ændret: {last_modified_time}5 år sidenOf course, please share! And for clarity (can't figure out how to edit the original post), when I said I "soaked the foam" in describing doing the glaze effect, I meant the foam applicator brush, not the foam moulding which I'd already painted with two coats of the base paint. Sorry for the foam/foam confusion there.
April Sakane
Forfatter5 år sidenFinally got around to installing the moulding in the closet. We are very happy with the end result.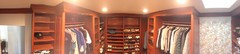

 PRO
PRONorwood Architects
4 år sidenOld thread or not it is pretty impressive! Great technique and am amazed how closely the painted/glazed moulding matches the cabinetry.
April Sakane thanked Norwood Architects April Sakane thanked Michele Haberli
April Sakane
Forfatter3 år sidenMichele, for the closet, I had an old Frazee paint chip color wheel and selected the color Mythic Fire,7796N. If you are going to try this project, you should probably get a color wheel and find the best undertone match for the wood you want to match, or take a sample of the wood to the paint store to look at chips if you don't have a wheel. What matched for my stained cherry wood may not be the best match for your wood or stain color. Good luck!
Michele Haberli
3 år sidenThanks for the help, your closet color is very similar to my kitchen cabinets. I will take a sample, your did a great job !
April Sakane thanked Michele Haberli

Reload the page to not see this specific ad anymore
Moulding Warehouse Ltd.